Tutorial Videos
This page indexes the four MRMC / Flair YouTube tutorial playlists already referenced by the knowledgebase. Each entry includes the source video, thumbnail, detailed AI summary, topic tags, and available chapter headings.
Playlists
- MRMC Academy - Motion Control Concepts — 17 videos
- Flair 7 Quick Tips and Tutorials — 12 videos
- Flair Training Videos — 29 videos
- Simul8 Tutorials — 10 videos
MRMC Academy - Motion Control Concepts
Short explainers covering motion control concepts, virtual production, scaling, repeat passes, PushMoco, target tracking, and rig selection.
1. What Is Cartesian Control?

We’re diving into Cartesian Controls. It might sound complex, but it’s more straightforward than you think.
For operators using this as a reference, the main focus is move programming, target tracking, and track calibration. It should help when deciding which Flair workflow, robot behaviour, or setup area is relevant before opening the full video.
The practical setup context is that hardware referenced includes CINEBOT_MINI and PRECISION_TRACK. This helps connect the video to the rig, accessory, software environment, or workflow label an operator may already be working with.
The chapter links below provide 5 timestamped jumps into the main setup, demonstration, and workflow moments, making it easier to go straight to the section that matches the issue or task being investigated.
Chapters
- 00:41 — tells the robot where it needs to be. And when we use target tracking modes,
- 01:27 — use this to our advantage by placing the track in a strategic position in
- 02:58 — facing. Carts view is the secret sauce that allows us to move in a nice arc
- 04:00 — and locked roll. We can use carts roll or locked roll to move in a way that
- 05:24 — modes to pilot the camera with precision to find the rest of the move. I found
2. The Importance Of Previsualization

Previs is all about planning your move before the camera ever rolls, helping you test ideas, refine timing, and walk onto set with confidence. It is a powerful part of the motion control workflow, but how does it actually work in practice?
For operators using this as a reference, the main focus is CGI matching, import/export, motion smoothing, and move programming. It should help when deciding which Flair workflow, robot behaviour, or setup area is relevant before opening the full video.
The practical setup context is that hardware referenced includes CAMERA_RED. This helps connect the video to the rig, accessory, software environment, or workflow label an operator may already be working with.
The chapter links below provide 3 timestamped jumps into the main setup, demonstration, and workflow moments, making it easier to go straight to the section that matches the issue or task being investigated.
Chapters
3. Scaling With Motion Control Part 2

It’s Time to Scale Things Up (Again)!
For operators using this as a reference, the main focus is Maya workflows, import/export, motion smoothing, move programming, and target tracking, while it also touches on track calibration. It should help when deciding which Flair workflow, robot behaviour, or setup area is relevant before opening the full video.
The practical setup context is that hardware referenced includes PRECISION_TRACK. This helps connect the video to the rig, accessory, software environment, or workflow label an operator may already be working with.
The chapter links below provide 6 timestamped jumps into the main setup, demonstration, and workflow moments, making it easier to go straight to the section that matches the issue or task being investigated.
Chapters
4. What Is Scaling In Motion Control?

This time around, @itsbenreel unpacks how you can use scaling to recreate the exact same camera move across different-sized subjects, or environments without rebuilding your move from scratch.
For operators using this as a reference, the main focus is CGI matching, EtherCAT, Maya workflows, import/export, and move programming, while it also touches on target tracking, track calibration, and zeroing. It should help when deciding which Flair workflow, robot behaviour, or setup area is relevant before opening the full video.
The practical setup context is that hardware referenced includes PRECISION_TRACK. This helps connect the video to the rig, accessory, software environment, or workflow label an operator may already be working with.
The chapter links below provide 5 timestamped jumps into the main setup, demonstration, and workflow moments, making it easier to go straight to the section that matches the issue or task being investigated.
Chapters
- 00:40 — you alter the size, position, or rotation of a camera move to create some
- 01:27 — move slower in real life. And the second
- 02:20 — camera to the right height and orientation that I want the move to
- 03:13 — way your edges are nice and clean. Being able to run the move in cartisian
- 04:12 — of final tips I'll leave you with. Uh, make sure that your focal lengths match
5. How Motion Control Powers Virtual Production

In this virtual production special, Ben dives into how motion control integrates with virtual production — specifically ICVFX, and how to film CGI and practical elements simultaneously to create ultra-realistic camera effects.
For operators using this as a reference, the main focus is CGI matching, Maya workflows, import/export, move programming, and target tracking, while it also touches on zeroing. It should help when deciding which Flair workflow, robot behaviour, or setup area is relevant before opening the full video.
The chapter links below provide 4 timestamped jumps into the main setup, demonstration, and workflow moments, making it easier to go straight to the section that matches the issue or task being investigated.
Chapters
- 00:17 — talking about integrating motion control with virtual production and more
- 01:02 — backgrounds onto. ICV effect studios use tracking systems to pinpoint the real
- 01:48 — Uh, this is what happens with the majority of tracking solutions. But once
- 02:33 — to be pretty good for this system. We'll back on the move. And as you can
6. How to Create Slow Motion Shots with Motion Control

Dive into the fascinating world of high-speed motion control and see how you can bring dynamic slow-motion effects to life.
For operators using this as a reference, the main focus is move programming, pre/post-roll, target tracking, and track calibration. It should help when deciding which Flair workflow, robot behaviour, or setup area is relevant before opening the full video.
The practical setup context is that hardware referenced includes BOLT and PRECISION_TRACK. This helps connect the video to the rig, accessory, software environment, or workflow label an operator may already be working with.
The chapter links below provide 6 timestamped jumps into the main setup, demonstration, and workflow moments, making it easier to go straight to the section that matches the issue or task being investigated.
Chapters
7. Triggering and Timing In Motion Control

In this episode of MRMC Academy, your host, @itsbenreel explores how synchronised triggers and components work with Flair motion control to execute perfectly timed shots.
For operators using this as a reference, the main focus is CGI matching, import/export, move programming, synchronization, and zeroing. It should help when deciding which Flair workflow, robot behaviour, or setup area is relevant before opening the full video.
The chapter links below provide 3 timestamped jumps into the main setup, demonstration, and workflow moments, making it easier to go straight to the section that matches the issue or task being investigated.
Chapters
8. What Is PushMoco?

Ever struggle to explain exactly how you want a shot to move? When working with camera robots, translating your vision into precise motion can sometimes be tricky, but that’s where PushMoco comes in.
For operators using this as a reference, the main focus is HHB, mimic systems, motion smoothing, move programming, and robot safety, while it also touches on target tracking and track calibration. It should help when deciding which Flair workflow, robot behaviour, or setup area is relevant before opening the full video.
The practical setup context is that hardware referenced includes CAMERA_RED, CINEBOT_MINI, HHB, MIMIC, and PRECISION_TRACK. This helps connect the video to the rig, accessory, software environment, or workflow label an operator may already be working with.
The chapter links below provide 6 timestamped jumps into the main setup, demonstration, and workflow moments, making it easier to go straight to the section that matches the issue or task being investigated.
Chapters
- 00:54 — tool that allows creative collaborators to physically move the camera into
- 02:39 — push Moko mode the robot's trying to work with you to move the camera and so
- 03:43 — Moco mode they will turn green push Moko does work with the track as well if you
- 04:51 — line we will move the robot to another
- 05:50 — subject point and just like that we have a three-point move let's see what it
- 08:14 — shoot and just like that we have a move
9. What Is Target Tracking?

This week, we’re diving into Target Tracking!
For operators using this as a reference, the main focus is CGI matching, move programming, and target tracking. It should help when deciding which Flair workflow, robot behaviour, or setup area is relevant before opening the full video.
The practical setup context is that hardware referenced includes CINEBOT_MINI. This helps connect the video to the rig, accessory, software environment, or workflow label an operator may already be working with.
The chapter links below provide 3 timestamped jumps into the main setup, demonstration, and workflow moments, making it easier to go straight to the section that matches the issue or task being investigated.
Chapters
10. What is a Repeat Pass?

Ever wonder how movies clone characters to share the screen with their real-life counterparts, or how commercials make products appear and disappear seamlessly—even during dynamic camera moves? It’s all thanks to motion control and a game-changing technique called the repeat-pass.
For operators using this as a reference, the main focus is CGI matching, move programming, and target tracking. It should help when deciding which Flair workflow, robot behaviour, or setup area is relevant before opening the full video.
The chapter links below provide 4 timestamped jumps into the main setup, demonstration, and workflow moments, making it easier to go straight to the section that matches the issue or task being investigated.
Chapters
11. Creating Precision Paths With Motion Control

Today, we’re diving into precision paths — how cameras and robotic systems move along a specific trajectory with pinpoint accuracy to pull off incredible shots.
For operators using this as a reference, the main focus is motion smoothing, move programming, target tracking, and zeroing. It should help when deciding which Flair workflow, robot behaviour, or setup area is relevant before opening the full video.
The chapter links below provide 2 timestamped jumps into the main setup, demonstration, and workflow moments, making it easier to go straight to the section that matches the issue or task being investigated.
Chapters
12. Transporting Your Cinebot Mini

Following Ben’s glowing recommendation in the previous episode, in this installment of MRMC Academy, he demonstrates just how quick and easy it is to pack up the Cinebot Mini and wheel it onto set.
For operators using this as a reference, the main focus is mimic systems and track calibration. It should help when deciding which Flair workflow, robot behaviour, or setup area is relevant before opening the full video.
The practical setup context is that hardware referenced includes CINEBOT_MINI and PRECISION_TRACK. This helps connect the video to the rig, accessory, software environment, or workflow label an operator may already be working with.
The chapter links below provide 6 timestamped jumps into the main setup, demonstration, and workflow moments, making it easier to go straight to the section that matches the issue or task being investigated.
Chapters
13. Why Get The Cinebot Mini?

Enjoy this very special episode of MRMC Academy—a passion project from Ben himself, where he shares exactly why he loves using the Cinebot Mini.
For operators using this as a reference, the main focus is move programming and track calibration. It should help when deciding which Flair workflow, robot behaviour, or setup area is relevant before opening the full video.
The practical setup context is that hardware referenced includes BOLT, BOLT_JR, CINEBOT_MINI, and PRECISION_TRACK. This helps connect the video to the rig, accessory, software environment, or workflow label an operator may already be working with.
The chapter links below provide 4 timestamped jumps into the main setup, demonstration, and workflow moments, making it easier to go straight to the section that matches the issue or task being investigated.
Chapters
14. Flair: The Industry Leading Motion Control Software

In this exciting episode of MRMC academy, we're diving into the details of Flair — the industry-leading software used by motion control professionals worldwide.
For operators using this as a reference, the main focus is CGI matching, import/export, move programming, robot safety, and target tracking, while it also touches on track calibration. It should help when deciding which Flair workflow, robot behaviour, or setup area is relevant before opening the full video.
The practical setup context is that hardware referenced includes PRECISION_TRACK, and software/version references include Flair7, and the working environment is Flair 7. This helps connect the video to the rig, accessory, software environment, or workflow label an operator may already be working with.
The chapter links below provide 5 timestamped jumps into the main setup, demonstration, and workflow moments, making it easier to go straight to the section that matches the issue or task being investigated.
Chapters
15. Which Rig Is Right For You?

In this episode, your host Ben explores the unique features of each leading MRMC motion control rig, offering insights into how each one might fit your setup. He even provides live demonstrations, showcasing how his own Cinebot Mini operates and how it can create impressive effects in confined spaces.
For operators using this as a reference, the main focus is HHB, Phantom workflows, mimic systems, and move programming. It should help when deciding which Flair workflow, robot behaviour, or setup area is relevant before opening the full video.
The practical setup context is that hardware referenced includes BOLT, BOLT_JR, BOLT_X, CINEBOT_MINI, HHB, and MIMIC. This helps connect the video to the rig, accessory, software environment, or workflow label an operator may already be working with.
The chapter links below provide 8 timestamped jumps into the main setup, demonstration, and workflow moments, making it easier to go straight to the section that matches the issue or task being investigated.
Chapters
16. The Evolution of Motion Control With MRMC

Dive into this exciting journey through the rich history of MRMC and discover how our motion control robotics have evolved from the early days to the cutting-edge technology we use today.
For operators using this as a reference, the main focus is firmware flashing, move programming, and target tracking. It should help when deciding which Flair workflow, robot behaviour, or setup area is relevant before opening the full video.
The practical setup context is that hardware referenced includes BOLT, BOLT_X, and CINEBOT_MINI. This helps connect the video to the rig, accessory, software environment, or workflow label an operator may already be working with.
The chapter links below provide 3 timestamped jumps into the main setup, demonstration, and workflow moments, making it easier to go straight to the section that matches the issue or task being investigated.
Chapters
17. What Is Motion Control?

Have you ever caught yourself asking, "What is motion control?" Well, ask no more! In the first episode of our new series, "MRMC Academy," our host @itsbenreel aims to answer all your burning questions and give you a breakdown of what exactly moco is and how it is used in the industry to create some awesome effects in film and commercial work.
For operators using this as a reference, the main focus is CGI matching, Maya workflows, Phantom workflows, import/export, and move programming, while it also touches on synchronization and target tracking. It should help when deciding which Flair workflow, robot behaviour, or setup area is relevant before opening the full video.
The practical setup context is that hardware referenced includes BOLT and CAMERA_PHANTOM. This helps connect the video to the rig, accessory, software environment, or workflow label an operator may already be working with.
The chapter links below provide 4 timestamped jumps into the main setup, demonstration, and workflow moments, making it easier to go straight to the section that matches the issue or task being investigated.
Chapters
Flair 7 Quick Tips and Tutorials
Short Flair 7 workflow videos for importing moves, triggers, Graph View, keyboard shortcuts, focus calibration, Live View, exporting, HHB setup, and the Tracker App.
1. Flair 7 Quick Tips: Move Import

In this Flair 7 Quick Tips tutorial Matt shows you the Move Import feature.
For operators using this as a reference, the main focus is CGI matching, Maya workflows, import/export, mimic systems, and move programming, while it also touches on target tracking and zeroing. It should help when deciding which Flair workflow, robot behaviour, or setup area is relevant before opening the full video.
The practical setup context is that hardware referenced includes MIMIC, and software/version references include Flair 7, and the working environment is Flair 7. This helps connect the video to the rig, accessory, software environment, or workflow label an operator may already be working with.
The chapter links below provide 3 timestamped jumps into the main setup, demonstration, and workflow moments, making it easier to go straight to the section that matches the issue or task being investigated.
Chapters
2. Flair 7 Quick Tips: Output Triggers

In this Flair 7 Quick Tips tutorial Matt shows you the set-up of output triggers.
For operators using this as a reference, the main focus is move programming, pre/post-roll, and synchronization. It should help when deciding which Flair workflow, robot behaviour, or setup area is relevant before opening the full video.
The practical setup context is that hardware referenced includes TRIGGER_BOX, and software/version references include Flair 7, and the working environment is Flair 7. This helps connect the video to the rig, accessory, software environment, or workflow label an operator may already be working with.
The chapter links below provide 4 timestamped jumps into the main setup, demonstration, and workflow moments, making it easier to go straight to the section that matches the issue or task being investigated.
Chapters
3. Flair 7 Quick Tips: Graph View

In this Flair 7 Quick Tips tutorial Matt shows you the dynamic features of the graph view.
For operators using this as a reference, the main focus is axis limits, motion smoothing, move programming, pre/post-roll, and robot safety, while it also touches on spline behaviour, target tracking, and zeroing. It should help when deciding which Flair workflow, robot behaviour, or setup area is relevant before opening the full video.
The practical setup context is that hardware referenced includes CAMERA_RED, and software/version references include Flair 7, and the working environment is Flair 7. This helps connect the video to the rig, accessory, software environment, or workflow label an operator may already be working with.
The chapter links below provide 5 timestamped jumps into the main setup, demonstration, and workflow moments, making it easier to go straight to the section that matches the issue or task being investigated.
Chapters
4. Flair 7 Quick Tips: Keyboard Shortcuts

For the next few weeks, every Friday we'll be bringing you a new tutorial to help you make the most of our premier motion control software, Flair 7.
For operators using this as a reference, the main focus is track calibration. It should help when deciding which Flair workflow, robot behaviour, or setup area is relevant before opening the full video.
The practical setup context is that hardware referenced includes PRECISION_TRACK, and software/version references include Flair 7, and the working environment is Flair 7. This helps connect the video to the rig, accessory, software environment, or workflow label an operator may already be working with.
The chapter links below provide 5 timestamped jumps into the main setup, demonstration, and workflow moments, making it easier to go straight to the section that matches the issue or task being investigated.
Chapters
5. Flair 7 Quick Tips: Focus Calibration

In our latest Flair 7 quick tips tutorial, Matt takes you through how to calibrate the focus of your selected lens, allowing you to create a move and have the focus automatically pull to the target point!
For operators using this as a reference, the main focus is lens calibration, move programming, robot safety, spline behaviour, and target tracking, while it also touches on zeroing. It should help when deciding which Flair workflow, robot behaviour, or setup area is relevant before opening the full video.
The practical setup context is that software/version references include Flair 7, and the working environment is Flair 7. This helps connect the video to the rig, accessory, software environment, or workflow label an operator may already be working with.
The chapter links below provide 4 timestamped jumps into the main setup, demonstration, and workflow moments, making it easier to go straight to the section that matches the issue or task being investigated.
Chapters
6. Flair 7 Quick Tips: Live View Setup

This week Matt takes you through how to set up and use the Live View, and how the cartesian control buttons act as a visual guide to help you control the camera in 3D space, simplifying the tracking capabilities of Flair!
For operators using this as a reference, the main focus is move programming, robot safety, and target tracking. It should help when deciding which Flair workflow, robot behaviour, or setup area is relevant before opening the full video.
The practical setup context is that software/version references include Flair 7, and the working environment is Flair 7. This helps connect the video to the rig, accessory, software environment, or workflow label an operator may already be working with.
The chapter links below provide 5 timestamped jumps into the main setup, demonstration, and workflow moments, making it easier to go straight to the section that matches the issue or task being investigated.
Chapters
7. Flair 7 Quick Tips: Exporting a Move

In this week's Flair 7 Quick Tip Matt takes you through how to export a move from Flair in a variety of formats!
For operators using this as a reference, the main focus is CGI matching, EtherCAT, Maya workflows, import/export, and move programming. It should help when deciding which Flair workflow, robot behaviour, or setup area is relevant before opening the full video.
The practical setup context is that software/version references include Flair 7, and the working environment is Flair 7. This helps connect the video to the rig, accessory, software environment, or workflow label an operator may already be working with.
The chapter links below provide 4 timestamped jumps into the main setup, demonstration, and workflow moments, making it easier to go straight to the section that matches the issue or task being investigated.
Chapters
8. Flair 7 Tutorial: Creating a 3 Point Move by Rite
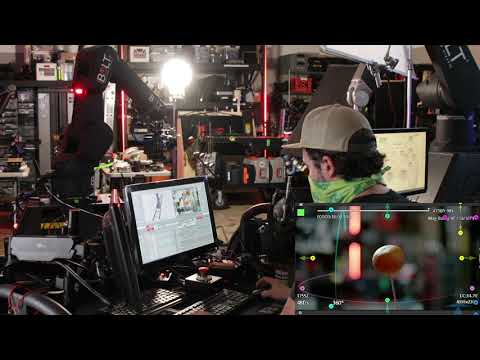
Rite talks us through creating a 3 point move in Flair 7.
For operators using this as a reference, the main focus is motion smoothing, move programming, spline behaviour, and track calibration. It should help when deciding which Flair workflow, robot behaviour, or setup area is relevant before opening the full video.
The practical setup context is that hardware referenced includes PRECISION_TRACK, and software/version references include Flair 7, and the working environment is Flair 7. This helps connect the video to the rig, accessory, software environment, or workflow label an operator may already be working with.
The chapter links below provide 6 timestamped jumps into the main setup, demonstration, and workflow moments, making it easier to go straight to the section that matches the issue or task being investigated.
Chapters
- 00:07 — today we're going to learn how to do a three-point move in flare 7.
- 01:31 — we go we can move using our carts and still be
- 02:49 — position one now if we look at our robot move up here it's just going in a
- 03:51 — we know that this is the peak of the move so maybe you want to tilt down a
- 04:42 — 88.1 because you're uh let's see your acceleration
- 06:23 — pretty close if we wanted to we could massage this move
9. Flair 7 Tutorial: Using Triggers by Rite

Rite talks us through using Triggers in Flair 7.
For operators using this as a reference, the main focus is move programming and synchronization. It should help when deciding which Flair workflow, robot behaviour, or setup area is relevant before opening the full video.
The practical setup context is that software/version references include Flair 7 and flair 7, and the working environment is Flair 7. This helps connect the video to the rig, accessory, software environment, or workflow label an operator may already be working with.
The chapter links below provide 2 timestamped jumps into the main setup, demonstration, and workflow moments, making it easier to go straight to the section that matches the issue or task being investigated.
Chapters
10. Flair 7 Quick Tips: Hand-held Box Configuration

In this Flair 7 Quick Tips tutorial Matt shows you the hand-held box setup and how to configure your USB controller for operating with Flair 7.
For operators using this as a reference, the main focus is HHB and zeroing. It should help when deciding which Flair workflow, robot behaviour, or setup area is relevant before opening the full video.
The practical setup context is that hardware referenced includes HHB, and software/version references include Flair 7, and the working environment is Flair 7. This helps connect the video to the rig, accessory, software environment, or workflow label an operator may already be working with.
The chapter links below provide 2 timestamped jumps into the main setup, demonstration, and workflow moments, making it easier to go straight to the section that matches the issue or task being investigated.
Chapters
11. Flair 7 Quick Tips: Customising the Main Window

Learn how to customise your main window layout and personalise your Flair experience.
For operators using this as a reference, the main focus is hot booting and move programming. It should help when deciding which Flair workflow, robot behaviour, or setup area is relevant before opening the full video.
The practical setup context is that software/version references include Flair 7, and the working environment is Flair 7. This helps connect the video to the rig, accessory, software environment, or workflow label an operator may already be working with.
The chapter links below provide 4 timestamped jumps into the main setup, demonstration, and workflow moments, making it easier to go straight to the section that matches the issue or task being investigated.
Chapters
12. MRMC Tracker App Features Reel

The MRMC Tracker App is your gateway to precision motion control filmmaking. The App empowers directors to capture and convey their vision effortlessly, using just an iPhone or iPad to frame and navigate a motion control shot.
For operators using this as a reference, the main focus is target tracking. It should help when deciding which Flair workflow, robot behaviour, or setup area is relevant before opening the full video.
The practical setup context is that the working environment is Flair 7. This helps connect the video to the rig, accessory, software environment, or workflow label an operator may already be working with.
The chapter links below provide 1 timestamped jumps into the main setup, demonstration, and workflow moments, making it easier to go straight to the section that matches the issue or task being investigated.
Chapters
Flair Training Videos
Longer Flair Classic training videos covering the core operator workflow: moves, curves, target tracking, lens calibration, cartesian control, triggers, sync, importing/exporting, axis setup, rig models, and FBX workflows.
1. 01- Intro to flair Part 1

Get familiar with the Flair interface. Learn how to control the axes of a robot, how to store waypoints to create a move and then how to run your move.
For operators using this as a reference, the main focus is motion smoothing, move programming, robot safety, and zeroing. It should help when deciding which Flair workflow, robot behaviour, or setup area is relevant before opening the full video.
The practical setup context is that hardware referenced includes BOLT and CAMERA_RED, and the working environment is Flair Classic. This helps connect the video to the rig, accessory, software environment, or workflow label an operator may already be working with.
The chapter links below provide 3 timestamped jumps into the main setup, demonstration, and workflow moments, making it easier to go straight to the section that matches the issue or task being investigated.
Chapters
2. 02 - Intro to flair Part 2

Learn about curves, speed ramping, pre- and post-roll to achieve the exact look of the motion in your footage you want.
For operators using this as a reference, the main focus is pre/post-roll. It should help when deciding which Flair workflow, robot behaviour, or setup area is relevant before opening the full video.
The practical setup context is that the working environment is Flair Classic. This helps connect the video to the rig, accessory, software environment, or workflow label an operator may already be working with.
The chapter links below provide 1 timestamped jumps into the main setup, demonstration, and workflow moments, making it easier to go straight to the section that matches the issue or task being investigated.
Chapters
3. 03 - Curve Adjustment

Look into advanced curve adjustments and focus pulling on multipoint moves.
For operators using this as a reference, the main focus is move programming and spline behaviour. It should help when deciding which Flair workflow, robot behaviour, or setup area is relevant before opening the full video.
The practical setup context is that the working environment is Flair Classic. This helps connect the video to the rig, accessory, software environment, or workflow label an operator may already be working with.
The chapter links below provide 10 timestamped jumps into the main setup, demonstration, and workflow moments, making it easier to go straight to the section that matches the issue or task being investigated.
Chapters
- 00:06 — [Music] we're now going to show some curve
- 00:56 — is changing direction not on the Waypoint the spline curve that defined
- 01:45 — fresh middle Mouse it changes the curve
- 02:35 — the Waypoint thus you have two entirely
- 03:33 — tilt to change direction twice if I now calculate that move and look at my
- 04:52 — wish go to a different frame somewhere along that move and slightly change
- 05:37 — moving the camera individually if I were to run that move shoot it waves around
- 06:24 — opportunity now arises having made that move and given it a name
- 07:46 — because other axes were not moving when I need the go to it didn't move to that
- 08:36 — want to focus on rather than not being in focus throughout the move I can add
4. 04 - Target Tracking Part 1

Understand the basics of target tracking to keep your subject in frame while moving the robot around it.
For operators using this as a reference, the main focus is move programming and target tracking. It should help when deciding which Flair workflow, robot behaviour, or setup area is relevant before opening the full video.
The practical setup context is that the working environment is Flair Classic. This helps connect the video to the rig, accessory, software environment, or workflow label an operator may already be working with.
The chapter links below provide 8 timestamped jumps into the main setup, demonstration, and workflow moments, making it easier to go straight to the section that matches the issue or task being investigated.
Chapters
- 00:30 — something whereby we introduced something called target tracking I'm
- 03:23 — there I have a to position move I'm
- 04:16 — and treat it as you can see from the move although we start looking at the
- 05:01 — going to use something called target tracking I'm going to go to the start of
- 07:03 — and I turn on something called target tracking tracking on and I also make my
- 07:51 — camera looks at the bottle precisely throughout the move this is called
- 08:38 — will be what I am looking at when I do my move this relies on my machine
- 09:30 — correct then I will be able to do accurate target tracking because flare
5. 05 - Target Tracking Part 2

Dive deep into more advanced target tracking and learn how to keep your subject in focus throughout the whole move.
For operators using this as a reference, the main focus is move programming, spline behaviour, target tracking, and zeroing. It should help when deciding which Flair workflow, robot behaviour, or setup area is relevant before opening the full video.
The practical setup context is that the working environment is Flair Classic. This helps connect the video to the rig, accessory, software environment, or workflow label an operator may already be working with.
The chapter links below provide 4 timestamped jumps into the main setup, demonstration, and workflow moments, making it easier to go straight to the section that matches the issue or task being investigated.
Chapters
6. 06 - Lens Calibration Part 1

Learn how to setup, scale and calibrate the focus axis of a lens in Flair.
For operators using this as a reference, the main focus is axis limits, lens calibration, motion smoothing, move programming, and robot safety, while it also touches on spline behaviour, target tracking, and zeroing. It should help when deciding which Flair workflow, robot behaviour, or setup area is relevant before opening the full video.
The practical setup context is that hardware referenced includes BOLT, and the working environment is Flair Classic. This helps connect the video to the rig, accessory, software environment, or workflow label an operator may already be working with.
The chapter links below provide 4 timestamped jumps into the main setup, demonstration, and workflow moments, making it easier to go straight to the section that matches the issue or task being investigated.
Chapters
7. 07 - Lens Calibration Part 2

Understand the relation between the lens and the robot, and learn how to measure the nodal point of the lens.
For operators using this as a reference, the main focus is lens calibration and zeroing. It should help when deciding which Flair workflow, robot behaviour, or setup area is relevant before opening the full video.
The practical setup context is that hardware referenced includes BOLT, and the working environment is Flair Classic. This helps connect the video to the rig, accessory, software environment, or workflow label an operator may already be working with.
The chapter links below provide 8 timestamped jumps into the main setup, demonstration, and workflow moments, making it easier to go straight to the section that matches the issue or task being investigated.
Chapters
8. 08 - Cartesian Control

Learn how to move the robot in 3D space by X-Y-Z axes instead of direct (joint) axes to easily and quickly manoeuvre to your desired framing.
For operators using this as a reference, the main focus is move programming. It should help when deciding which Flair workflow, robot behaviour, or setup area is relevant before opening the full video.
The practical setup context is that the working environment is Flair Classic. This helps connect the video to the rig, accessory, software environment, or workflow label an operator may already be working with.
The chapter links below provide 1 timestamped jumps into the main setup, demonstration, and workflow moments, making it easier to go straight to the section that matches the issue or task being investigated.
Chapters
9. 09 - TT and cart theory

Get a better understanding of cartesian control and it’s relation to target tracking.
For operators using this as a reference, the main focus is move programming and target tracking. It should help when deciding which Flair workflow, robot behaviour, or setup area is relevant before opening the full video.
The practical setup context is that the working environment is Flair Classic. This helps connect the video to the rig, accessory, software environment, or workflow label an operator may already be working with.
The chapter links below provide 9 timestamped jumps into the main setup, demonstration, and workflow moments, making it easier to go straight to the section that matches the issue or task being investigated.
Chapters
- 00:11 — we need to put some theory to understand why target tracking in Cartesian
- 00:58 — my machine so I need a large axis but move my camera in X Y and instead
- 01:57 — thus in order for target tracking to
- 02:43 — to be able to move my camera in 3d space
- 03:32 — defines which axes our target tracking
- 04:30 — therefore I have three large axes that move my camera and define where in space
- 05:17 — camera the target is moving in space so pan as a target tracking axis is obeying
- 06:04 — camera therefore I can move my camera in
- 06:50 — tracking actually he's free to do
10. 10 - Triggers Box and bloop
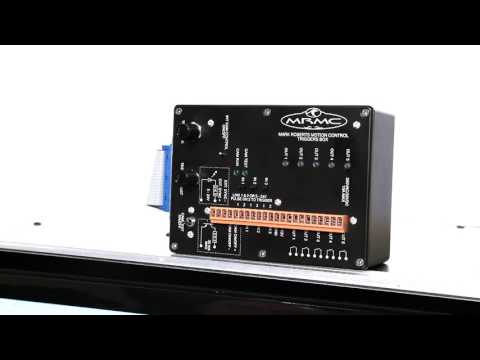
Learn how to sync external devices and events to the movement of the robot and the footage.
For operators using this as a reference, the main focus is CGI matching, firmware flashing, move programming, pre/post-roll, and synchronization. It should help when deciding which Flair workflow, robot behaviour, or setup area is relevant before opening the full video.
The practical setup context is that hardware referenced includes BLOOP_LIGHT and TRIGGER_BOX, and the working environment is Flair Classic. This helps connect the video to the rig, accessory, software environment, or workflow label an operator may already be working with.
The chapter links below provide 4 timestamped jumps into the main setup, demonstration, and workflow moments, making it easier to go straight to the section that matches the issue or task being investigated.
Chapters
11. 11 - Camera Triggering and Synchronisation

Learn how to synchronise Flair and the robot to the camera and how to trigger it.
For operators using this as a reference, the main focus is EtherCAT, Phantom workflows, move programming, pre/post-roll, and robot safety, while it also touches on synchronization and zeroing. It should help when deciding which Flair workflow, robot behaviour, or setup area is relevant before opening the full video.
The practical setup context is that hardware referenced includes BOLT and CAMERA_PHANTOM, and the working environment is Flair Classic. This helps connect the video to the rig, accessory, software environment, or workflow label an operator may already be working with.
The chapter links below provide 3 timestamped jumps into the main setup, demonstration, and workflow moments, making it easier to go straight to the section that matches the issue or task being investigated.
Chapters
12. 12 - Example Move Program

Go through the process of creating a move.
For operators using this as a reference, the main focus is move programming, robot safety, and zeroing. It should help when deciding which Flair workflow, robot behaviour, or setup area is relevant before opening the full video.
The practical setup context is that the working environment is Flair Classic. This helps connect the video to the rig, accessory, software environment, or workflow label an operator may already be working with.
The chapter links below provide 4 timestamped jumps into the main setup, demonstration, and workflow moments, making it easier to go straight to the section that matches the issue or task being investigated.
Chapters
13. 13. Browsing and GoTo

What care they need to take when doing Gotos, and a method for overcoming it, and a very useful system for checking a move.
For operators using this as a reference, the main focus is HHB, move programming, and robot safety. It should help when deciding which Flair workflow, robot behaviour, or setup area is relevant before opening the full video.
The practical setup context is that hardware referenced includes HHB, and the working environment is Flair Classic. This helps connect the video to the rig, accessory, software environment, or workflow label an operator may already be working with.
The chapter links below provide 6 timestamped jumps into the main setup, demonstration, and workflow moments, making it easier to go straight to the section that matches the issue or task being investigated.
Chapters
14. 14. Tracks, Master axes and Cartesians

The addition of track and the advantages brought by this and the use of master axes.
For operators using this as a reference, the main focus is move programming, target tracking, and track calibration. It should help when deciding which Flair workflow, robot behaviour, or setup area is relevant before opening the full video.
The practical setup context is that hardware referenced includes PRECISION_TRACK, and the working environment is Flair Classic. This helps connect the video to the rig, accessory, software environment, or workflow label an operator may already be working with.
The chapter links below provide 8 timestamped jumps into the main setup, demonstration, and workflow moments, making it easier to go straight to the section that matches the issue or task being investigated.
Chapters
- 00:13 — having three large Exige you used to move the camera in X Y Z and three small
- 01:09 — to be able to decide which of those target tracking axes are not going to be
- 01:57 — four possible target tracking axes to
- 02:52 — place the whole machine in order to do accurate target tracking the object of
- 03:56 — have my arm stays black because it is a master axis my track is actually x-axis
- 04:45 — order to have that type of job but then if I am in Cartesian view and I move the
- 05:32 — my arm is a target tracking axis so now
- 06:19 — these axes here the track is a master
15. 15. Zeros and Limits

Setting up zero positions for the machine and the use of limits.
For operators using this as a reference, the main focus is CGI matching, axis limits, mimic systems, motion smoothing, and robot safety, while it also touches on target tracking, track calibration, and zeroing. It should help when deciding which Flair workflow, robot behaviour, or setup area is relevant before opening the full video.
The practical setup context is that hardware referenced includes PRECISION_TRACK, and the working environment is Flair Classic. This helps connect the video to the rig, accessory, software environment, or workflow label an operator may already be working with.
The chapter links below provide 10 timestamped jumps into the main setup, demonstration, and workflow moments, making it easier to go straight to the section that matches the issue or task being investigated.
Chapters
- 00:22 — necessary and we want to know a reference point about which that file
- 01:07 — and those motors can go to the home zero
- 01:53 — engage the motor and we directly zero
- 02:42 — axis each morning when we turn on the machine needs to go and find its zero
- 03:28 — checked the magnetic edge against a single line on the track encoder this
- 04:26 — there's the magnet counting zero marker
- 05:16 — distance to my hardware limits I have to have Hardware limits on the track that
- 06:02 — at 403 centimeters forward of my datum
- 06:48 — I am trying to make it go run forward it stops on the software limit which I have
- 07:34 — the only reason I need to find home for
16. 16. Exporting Moves

Introduction to exporting moves into Maya and other CG platforms.
For operators using this as a reference, the main focus is CGI matching, Maya workflows, import/export, and move programming. It should help when deciding which Flair workflow, robot behaviour, or setup area is relevant before opening the full video.
The practical setup context is that the working environment is Flair Classic. This helps connect the video to the rig, accessory, software environment, or workflow label an operator may already be working with.
The chapter links below provide 3 timestamped jumps into the main setup, demonstration, and workflow moments, making it easier to go straight to the section that matches the issue or task being investigated.
Chapters
17. 17. Importing Moves

Introduction to sequences for importing other previs and moves.
For operators using this as a reference, the main focus is CGI matching, Maya workflows, import/export, motion smoothing, and move programming, while it also touches on robot safety, target tracking, and track calibration. It should help when deciding which Flair workflow, robot behaviour, or setup area is relevant before opening the full video.
The practical setup context is that hardware referenced includes PRECISION_TRACK, and the working environment is Flair Classic. This helps connect the video to the rig, accessory, software environment, or workflow label an operator may already be working with.
The chapter links below provide 10 timestamped jumps into the main setup, demonstration, and workflow moments, making it easier to go straight to the section that matches the issue or task being investigated.
Chapters
- 00:28 — run on your machine so you need to take his pre-visualization and import it into
- 01:21 — view this on our rig model to see what the move is
- 02:07 — to import it again and I'm going to set
- 02:52 — reaching it one of the things I can do is I can move my master axis in order to
- 03:41 — importing every tenth frame which will enable me to better maneuver the job
- 04:31 — three meters in X so it is in the center of my rail I'm also going to bring it
- 05:35 — therefore I'm going to import again at
- 06:21 — have been provisioned iced by a client in a virtual world you can stop dead
- 07:07 — rotated the move to fit better on the
- 08:23 — that works fine if it's on my rail I
18. 18 - Flair Axis Setup

How to set up a new Axis or Turntable in Flair.
For operators using this as a reference, the main focus is EtherCAT, HHB, Maya workflows, axis limits, and import/export, while it also touches on mimic systems, motion smoothing, move programming, robot safety, and target tracking. It should help when deciding which Flair workflow, robot behaviour, or setup area is relevant before opening the full video.
The practical setup context is that hardware referenced includes BOLT, CAMERA_RED, HHB, PRECISION_TRACK, ROOTBOX, and TURNTABLE, and the working environment is Flair Classic. This helps connect the video to the rig, accessory, software environment, or workflow label an operator may already be working with.
The chapter links below provide 23 timestamped jumps into the main setup, demonstration, and workflow moments, making it easier to go straight to the section that matches the issue or task being investigated.
Chapters
- 00:00 — Intro
- 02:12 — The Axis
- 03:17 — Internal Scale
- 03:43 — Independent Axis
- 04:08 — Tuning
- 05:00 — Control
- 05:43 — Turntable
- 05:59 — Speed
- 07:08 — Scale
- 09:28 — Calculate Scale
- 12:07 — Scale Axis
- 13:27 — Speed Test
- 14:48 — No Mode
- 15:58 — Acceleration
- 17:10 — Goto Velocity
- 18:05 — Turntable Limit
- 19:06 — Zeroing
- 20:47 — Zero
- 20:54 — Zero Offset
- 22:39 — Zero Speed
- 22:50 — Handheld Boss Velocity
- 23:24 — Right Click Setup
- 24:18 — Save as
19. 19 - Milo Introduction

An Introduction to the Top Motion Control Rig available worldwide.
For operators using this as a reference, the main focus is CGI matching, import/export, motion smoothing, move programming, and target tracking, while it also touches on track calibration. It should help when deciding which Flair workflow, robot behaviour, or setup area is relevant before opening the full video.
The practical setup context is that hardware referenced includes BOLT and PRECISION_TRACK, and the working environment is Flair Classic. This helps connect the video to the rig, accessory, software environment, or workflow label an operator may already be working with.
The chapter links below provide 5 timestamped jumps into the main setup, demonstration, and workflow moments, making it easier to go straight to the section that matches the issue or task being investigated.
Chapters
20. 23 - Scaling on a Milo

How to do that precision Scaling shot.
For operators using this as a reference, the main focus is CGI matching, EtherCAT, move programming, robot safety, and target tracking, while it also touches on track calibration. It should help when deciding which Flair workflow, robot behaviour, or setup area is relevant before opening the full video.
The practical setup context is that the working environment is Flair Classic. This helps connect the video to the rig, accessory, software environment, or workflow label an operator may already be working with.
The chapter links below provide 4 timestamped jumps into the main setup, demonstration, and workflow moments, making it easier to go straight to the section that matches the issue or task being investigated.
Chapters
21. 21 - Nodal Offsets

How to measure the lens nodal offsets for accurate Filming and Export from Flair.
For operators using this as a reference, the main focus is CGI matching, Maya workflows, import/export, move programming, and zeroing. It should help when deciding which Flair workflow, robot behaviour, or setup area is relevant before opening the full video.
The practical setup context is that hardware referenced includes BOLT, and the working environment is Flair Classic. This helps connect the video to the rig, accessory, software environment, or workflow label an operator may already be working with.
The chapter links below provide 2 timestamped jumps into the main setup, demonstration, and workflow moments, making it easier to go straight to the section that matches the issue or task being investigated.
Chapters
22. 22 - Rig Model and Animation

The use of the Rig model to see your moves, and an Introduction to Animation.
For operators using this as a reference, the main focus is move programming and track calibration. It should help when deciding which Flair workflow, robot behaviour, or setup area is relevant before opening the full video.
The practical setup context is that hardware referenced includes PRECISION_TRACK, and the working environment is Flair Classic. This helps connect the video to the rig, accessory, software environment, or workflow label an operator may already be working with.
The chapter links below provide 7 timestamped jumps into the main setup, demonstration, and workflow moments, making it easier to go straight to the section that matches the issue or task being investigated.
Chapters
- 00:13 — okay if I have my kinematics set so that I'm a master is extend rather than track
- 01:00 — there we are I'm now going to pull out slightly using the track button so I'm
- 02:06 — now I have a hundred frames between each of these I'm going to scale that move to
- 02:54 — machine that I can zoom in on and I can also move around if I me too and I can
- 03:59 — go to one frame per second and I'm going to scale my move to fifty frames
- 04:50 — step it will take a frame and move and
- 05:44 — step and have some kind of delay built in before our move continues we can put
23. From Flair to Maya (Part 1)

In this tutorial, we learn how to import an FBX with a camera movement from Flair into Maya, including setting up an image sequence as an image plane using a bloop light.
For operators using this as a reference, the main focus is CGI matching, Maya workflows, firmware flashing, import/export, and kinematics, while it also touches on move programming, synchronization, target tracking, and zeroing. It should help when deciding which Flair workflow, robot behaviour, or setup area is relevant before opening the full video.
The practical setup context is that hardware referenced includes BLOOP_LIGHT and BOLT, and the working environment is Flair Classic. This helps connect the video to the rig, accessory, software environment, or workflow label an operator may already be working with.
The chapter links below provide 4 timestamped jumps into the main setup, demonstration, and workflow moments, making it easier to go straight to the section that matches the issue or task being investigated.
Chapters
24. From Flair to Maya (Part 2)

In this part of the tutorial, we learn how to use reference points taken on set, to align an exported camera movement; we also see how to quick fix a camera animation for rough composition purposes.
For operators using this as a reference, the main focus is CGI matching, Maya workflows, import/export, kinematics, and move programming, while it also touches on robot safety, track calibration, and zeroing. It should help when deciding which Flair workflow, robot behaviour, or setup area is relevant before opening the full video.
The practical setup context is that hardware referenced includes PRECISION_TRACK, and the working environment is Flair Classic. This helps connect the video to the rig, accessory, software environment, or workflow label an operator may already be working with.
The chapter links below provide 20 timestamped jumps into the main setup, demonstration, and workflow moments, making it easier to go straight to the section that matches the issue or task being investigated.
Chapters
- 00:00 —
- 00:03 — welcome back to part 2 of this tutorial importing camera movements
- 01:19 — contextualize the camera movement
- 01:50 — position them in the right place
- 03:35 — set up three camera positions with the rig
- 08:46 — duplicate at frame 0 another locator
- 09:21 — select each locators
- 10:21 — move them along the z axis
- 13:04 — align your camera movement to the geometry
- 14:19 — align the camera to the geometry
- 14:57 — move the locators
- 17:04 — create a a single group containing reference points
- 18:47 — snap it to these locators
- 21:16 — rotate a bit
- 23:01 — calibrate the camera properly with lens
- 25:09 — animate the offset of your camera
- 25:16 — animate the offset in order to match the camera movement better
- 25:47 — analyze the footage
- 27:31 — select back the rotation of the camera group
- 32:05 — start setting up lighting and shadows
25. 20 - Long Arm Milo Introduction

The Long Arm version of the Milo, Takes a lens to 6 metres up with Precision.
For operators using this as a reference, the main focus is move programming, robot safety, track calibration, and zeroing. It should help when deciding which Flair workflow, robot behaviour, or setup area is relevant before opening the full video.
The practical setup context is that the working environment is Flair Classic. This helps connect the video to the rig, accessory, software environment, or workflow label an operator may already be working with.
The chapter links below provide 4 timestamped jumps into the main setup, demonstration, and workflow moments, making it easier to go straight to the section that matches the issue or task being investigated.
Chapters
26. FBX Import to Bolt Pedestal

In this tutorial learn how to load an FBX file to Flair for the Bolt on Pedestal.
For operators using this as a reference, the main focus is EtherCAT, Maya workflows, import/export, move programming, and robot safety, while it also touches on track calibration. It should help when deciding which Flair workflow, robot behaviour, or setup area is relevant before opening the full video.
The practical setup context is that hardware referenced includes BOLT, CAMERA_RED, and PRECISION_TRACK, and the working environment is Flair Classic. This helps connect the video to the rig, accessory, software environment, or workflow label an operator may already be working with.
The chapter links below provide 10 timestamped jumps into the main setup, demonstration, and workflow moments, making it easier to go straight to the section that matches the issue or task being investigated.
Chapters
- 00:03 — so in this video we're going to be importing our three mode FBX file into a
- 00:51 — positions that may change as soon as we do an import because we're being porting
- 01:38 — version is fully licensed to use FBX so
- 02:41 — that onto my pedestal I can see that I obviously me to move in why probably by
- 04:16 — do this there are two solutions to a an import here and the mathematics can
- 05:24 — managing to do there but I'm getting close to running my move correctly I
- 07:39 — tilt 90 so what I'm going to do is I'm going to go back to my import let me
- 08:38 — that is successfully running the move
- 11:00 — let's have a look and see if I can actually run that says it's too fast but
- 12:08 — 180 frames just to see if that will stretch my move and make it more
27. FBX Import to Bolt on Track (Part 1)

In this tutorial learn how to load an FBX file to Flair for the Bolt on Track (Part 1).
For operators using this as a reference, the main focus is EtherCAT, Maya workflows, import/export, motion smoothing, and move programming, while it also touches on target tracking, track calibration, and zeroing. It should help when deciding which Flair workflow, robot behaviour, or setup area is relevant before opening the full video.
The practical setup context is that hardware referenced includes BOLT, CAMERA_RED, and PRECISION_TRACK, and the working environment is Flair Classic. This helps connect the video to the rig, accessory, software environment, or workflow label an operator may already be working with.
The chapter links below provide 16 timestamped jumps into the main setup, demonstration, and workflow moments, making it easier to go straight to the section that matches the issue or task being investigated.
Chapters
- 00:03 — we're now going to try importing that same move into a ball contract bear in
- 00:51 — up let's have a look at our rig model there we are both on track top mounted
- 01:41 — there's my move there now at first I'm
- 02:27 — import if I look now at that move on my
- 03:27 — what I am importing this choice of using track as a master may not be the optimum
- 04:22 — to rotate my move about my 0 by 90
- 05:14 — points but is actually located on the rail itself now if I try to run that
- 06:18 — possibility of going to arm master so that the track is actually part of the
- 07:25 — is out here so I will be able to better reach and do things and my track is
- 08:12 — let's put 0.8 there and do my import
- 09:00 — move there where my tilt tilts up
- 10:15 — am actually hitting with the camera to solve that problem I need to move my arm
- 11:12 — they're showing me that I have actually reached the move position correct let's
- 11:58 — too fast there by six times it wants to
- 13:09 — let's now just as an experiment stretch part of our move let's go from Waypoint
- 13:57 — fast for the track at with the
28. FBX Import to Bolt on Track (Part 2)

In this tutorial learn how to load an FBX file to Flair for the Bolt on Track (Part 2).
For operators using this as a reference, the main focus is Maya workflows, axis limits, import/export, move programming, and track calibration, while it also touches on zeroing. It should help when deciding which Flair workflow, robot behaviour, or setup area is relevant before opening the full video.
The practical setup context is that hardware referenced includes BOLT and PRECISION_TRACK, and the working environment is Flair Classic. This helps connect the video to the rig, accessory, software environment, or workflow label an operator may already be working with.
The chapter links below provide 12 timestamped jumps into the main setup, demonstration, and workflow moments, making it easier to go straight to the section that matches the issue or task being investigated.
Chapters
- 00:03 — I think we can safely say that because of the restrictions in the speed of the
- 00:51 — back to a track master this means that
- 01:47 — again there we are again here we have the move but here we have the arm being
- 02:37 — I need so it looks like what I need to do is add some track positions and
- 03:27 — to our start position and I am within reach of the position of the move and I
- 04:14 — forward that way so maybe instead of using 100 and zero I should use 130
- 05:13 — later position let's make it there instead I could of course re-import with
- 06:01 — not exceeding position you made me play him anyway let's try running that track
- 06:47 — total move if we accepted this fastest
- 07:40 — hitting anything without tripping my axes without meeting any limit or speed
- 08:28 — could only create a move that you he
- 09:21 — could put master axes in place in order to prevision eyes the move before
29. Exporting FBX with reference points from Flair to Maya

This tutorial goes over exporting an FBX file from Flair with reference points and then importing it to Maya.
For operators using this as a reference, the main focus is CGI matching, EtherCAT, Maya workflows, import/export, and kinematics, while it also touches on move programming, target tracking, track calibration, and zeroing. It should help when deciding which Flair workflow, robot behaviour, or setup area is relevant before opening the full video.
The practical setup context is that hardware referenced includes CAMERA_RED and PRECISION_TRACK, and the working environment is Flair Classic. This helps connect the video to the rig, accessory, software environment, or workflow label an operator may already be working with.
The chapter links below provide 12 timestamped jumps into the main setup, demonstration, and workflow moments, making it easier to go straight to the section that matches the issue or task being investigated.
Chapters
- 00:07 — in this tutorial i will show you how to export reference points
- 00:59 — got blue plate and frame number zero so zero from 99.
- 01:47 — the fbx the first thing i notice is that
- 02:57 — and watch the tutorial the previous tutorial on how to import reference
- 04:11 — tweak the camera animation in order to match properly that offset
- 04:58 — before shooting a motion control move
- 05:46 — quite accurate and that the kinematic also are probably quite
- 06:40 — right the next thing that i want to do is to import a
- 07:26 — a geometry to survey data
- 08:12 — 3d geometry
- 09:21 — let's look at the geometry for a top
- 10:24 — what i would do is to select the camera node the group node of the camera
Simul8 Tutorials
Maya/Simul8 tutorials for path creation, smoothing, camera head setup, RigMover nodes, limit checking, kinematic import, and 3-node camera animation in cartesian space.
1. Simul8 Tutorial: Introduction

In this Simul8 tutorial learn what Simul8 for Maya 2018/19 has to offer.
For operators using this as a reference, the main focus is CGI matching, EtherCAT, Maya workflows, axis limits, and import/export, while it also touches on kinematics, mimic systems, motion smoothing, move programming, and target tracking. It should help when deciding which Flair workflow, robot behaviour, or setup area is relevant before opening the full video.
The practical setup context is that hardware referenced includes CAMERA_RED, MIMIC, PRECISION_TRACK, and TURNTABLE. This helps connect the video to the rig, accessory, software environment, or workflow label an operator may already be working with.
The chapter links below provide 13 timestamped jumps into the main setup, demonstration, and workflow moments, making it easier to go straight to the section that matches the issue or task being investigated.
Chapters
- 00:10 — in this tutorial I will introduce you to simulate simulate is a plugin from Maya
- 01:36 — of the camera and so on in order to input rig right click on import rig
- 02:54 — allow for 20 centimeters this is usually the height of the rail once again
- 04:55 — camera and then select the remove the rig mover node and constrain it to it so
- 05:47 — after that you can apply to the silver in order to move the rig to match the
- 06:34 — limit the minimum limit is not infinite
- 07:21 — the viewport and then as I can move the truck further
- 08:08 — what I can do now is export this reg
- 08:57 — the operator now is going to be ready to import the move and mimic and run it and
- 09:52 — flour and there will be a velocities and acceleration maximum FPS which are as I
- 11:07 — and I can see through the limit try to
- 12:22 — know for example rig turntable or something that you want to keep track of
- 13:07 — so the next step the next step would be select this rig and import about clear
2. Simul8 Tutorial: How to Install Simul8

In this Simul8 tutorial, you'll learn how to install Simul8 and request a license. After that, you'll be all set to start using it in Maya 2018/2019.
For operators using this as a reference, the main focus is Maya workflows, import/export, and move programming. It should help when deciding which Flair workflow, robot behaviour, or setup area is relevant before opening the full video.
The chapter links below provide 4 timestamped jumps into the main setup, demonstration, and workflow moments, making it easier to go straight to the section that matches the issue or task being investigated.
Chapters
3. Simul8 Tutorial: Path Tool

Technical tutorial containing timestamped references for EtherCAT, Maya workflows, axis limits, import/export, motion smoothing.
For operators using this as a reference, the main focus is EtherCAT, Maya workflows, axis limits, import/export, and motion smoothing, while it also touches on move programming, spline behaviour, track calibration, and zeroing. It should help when deciding which Flair workflow, robot behaviour, or setup area is relevant before opening the full video.
The practical setup context is that hardware referenced includes CAMERA_ARRI, CAMERA_RED, and PRECISION_TRACK. This helps connect the video to the rig, accessory, software environment, or workflow label an operator may already be working with.
The chapter links below provide 7 timestamped jumps into the main setup, demonstration, and workflow moments, making it easier to go straight to the section that matches the issue or task being investigated.
Chapters
4. Simul8 Tutorial: Smooth Tutorial

Technical tutorial containing timestamped references for Maya workflows, import/export, motion smoothing, move programming, spline behaviour.
For operators using this as a reference, the main focus is Maya workflows, import/export, motion smoothing, move programming, and spline behaviour, while it also touches on target tracking and track calibration. It should help when deciding which Flair workflow, robot behaviour, or setup area is relevant before opening the full video.
The practical setup context is that hardware referenced includes PRECISION_TRACK. This helps connect the video to the rig, accessory, software environment, or workflow label an operator may already be working with.
The chapter links below provide 8 timestamped jumps into the main setup, demonstration, and workflow moments, making it easier to go straight to the section that matches the issue or task being investigated.
Chapters
- 00:07 — in this simulate tutorial I will show you how to use the smooth tool in the
- 01:00 — pond that looks like a city drawbacks off camera tracking however is that when
- 01:56 — you're gonna have that time trying to run that move you got smoothing in Fleur
- 02:44 — smooth tool and as you can see the
- 03:30 — translate and then I'm gonna buffer it and press the smooth button the first
- 04:15 — there are director cases where you want the extremes of the curve being the same
- 05:02 — want is the curve to maintain this
- 06:21 — planning it then it would create a nice little curve around it and that's
5. Simul8 Tutorial: Span Tool

In this Simul8 tutorial, you'll learn you how to use the Span tool in order to re-sample portions of "baked" fcurves in Maya 2018/19, so that they will follow a cubic curve kind of interpolation in-between the boundary keyframes of the selected portion of curve.
For operators using this as a reference, the main focus is Maya workflows, import/export, motion smoothing, move programming, and spline behaviour, while it also touches on target tracking. It should help when deciding which Flair workflow, robot behaviour, or setup area is relevant before opening the full video.
The practical setup context is that hardware referenced includes CAMERA_RED. This helps connect the video to the rig, accessory, software environment, or workflow label an operator may already be working with.
The chapter links below provide 5 timestamped jumps into the main setup, demonstration, and workflow moments, making it easier to go straight to the section that matches the issue or task being investigated.
Chapters
- 00:25 — solving version of the license and they allow you to move and interact with
- 02:15 — and that press expand that will basically try to follow the curvature of
- 03:06 — these two it's very important you understand that it's not gonna follow
- 03:53 — in the gap of the key frame selected so I said I want to follow curvature from
- 05:32 — three because we want them flat but i will set up the rest of the curve and
6. Simul8 Tutorial: Camera Head Tool
Technical tutorial containing timestamped references for EtherCAT, Maya workflows, axis limits, import/export, motion smoothing.
For operators using this as a reference, the main focus is EtherCAT, Maya workflows, axis limits, import/export, and motion smoothing, while it also touches on move programming, spline behaviour, and track calibration. It should help when deciding which Flair workflow, robot behaviour, or setup area is relevant before opening the full video.
The practical setup context is that hardware referenced includes PRECISION_TRACK. This helps connect the video to the rig, accessory, software environment, or workflow label an operator may already be working with.
The chapter links below provide 16 timestamped jumps into the main setup, demonstration, and workflow moments, making it easier to go straight to the section that matches the issue or task being investigated.
Chapters
- 04:48 — are moving so you would expect only to move the rotates a really the same
- 05:47 — without changing there is oh the rotate order can be found in the transform node
- 06:33 — if you want to move a pan or you want to
- 07:29 — objects each one with one single access so basically what is doing these node
- 08:19 — perspective view here right then what I would do I would select the parent node
- 09:07 — out of nodes and shows your be better how Maya works behind the wood this is
- 10:12 — reason why I will show you later this is a transform node
- 11:15 — is basically having related to the orientation of Maya the global space the
- 12:43 — baked the animation but I left the import active on so I will switch this
- 14:13 — me hide the original camera when I select the camera head node till
- 16:11 — keyframes at the end and at the start of your keyframe selection so now I've
- 17:04 — you see you will see that the purple is they camera head node the one that we
- 19:10 — actually that's back to 100 if I was to create a camera head node on a scaled
- 20:11 — as it stands at the moment the camera had to doesn't keep track of rounds in
- 21:52 — happening here is that is basically not filtering for Euler rotation as Maya
- 22:58 — linear well not really linear but like you've got like a continuous curve which
7. Simul8 Tutorial: RigMover Node

In this Simul8 tutorial, we show you how to use the rigmover node. The inverse kinematics solver that allows you to easily animate in 3D any MRMOCO rig.
For operators using this as a reference, the main focus is EtherCAT, Maya workflows, import/export, kinematics, and move programming, while it also touches on spline behaviour, target tracking, track calibration, and zeroing. It should help when deciding which Flair workflow, robot behaviour, or setup area is relevant before opening the full video.
The practical setup context is that hardware referenced includes CAMERA_RED and PRECISION_TRACK. This helps connect the video to the rig, accessory, software environment, or workflow label an operator may already be working with.
The chapter links below provide 30 timestamped jumps into the main setup, demonstration, and workflow moments, making it easier to go straight to the section that matches the issue or task being investigated.
Chapters
- 00:16 — kinematics over that comes with simulate plugin for Maya
- 01:11 — you very briefly all these buttons what they do and how to import rigs and
- 02:22 — the camera that you want to apply the rig move a node to and then ctrl select
- 03:21 — as many notice I'm just going to isolate these rig move a node arrow this
- 04:25 — move manoda the move mode is in track
- 05:13 — for extent angle are at zero and that is
- 06:00 — below the zero what I do is to translate
- 07:36 — and animating all the other axis for you because it's an inverse kinematic so the
- 08:59 — not influence this over okay back to the move what you would typically do let's
- 09:53 — what I can do I've got my first keyframe here you can
- 10:58 — based on the track hint values I gave
- 12:21 — just gonna put the extent back in let's start like that and keyframe it at the
- 13:19 — to show you now is if I back go back to the move mode truck the truck mode let's
- 14:21 — down the ad should be down the at the custom attributes in the rig-move mode
- 15:50 — inclination related to the truck sorry the rail so these are 2 different angle
- 17:05 — line along the left axis what it does is basically with zero on the horizontal
- 18:39 — going through the gimbal so you probably want to either move the camera in this
- 19:26 — can be useful sometimes since we are in move mode truck at the moment I'm going
- 20:15 — I want the base to follow the other side
- 21:38 — back to the other side that option obviously only works when move mode
- 22:46 — say that that's about a feature is the silver is gonna be keeping track of the
- 24:02 — better what I mean so I'm going to detach the rig mover node from the
- 25:38 — on rotate as well and on row so remover select the node and then in rig mover
- 27:45 — alike a cash cow affordable X when they get imported and the rig move or get
- 31:22 — truck at the beginning at the end of the move and now the truck is basically
- 34:55 — it when it's gonna be imported into my you'll see you will have LW rail objects
- 36:26 — top of this one next so at the moment to change the distance of the tilt node
- 37:11 — measurement the rig move our node and the place is where to do that is from
- 38:10 — and hence the translate Y will be negative oh five in the rig mover node
- 39:00 — seems quite okay so from here I can then do what I want I can move the rail I can
8. Simul8 Tutorial: Limit Checker

In this Simul8 tutorial, you'll learn how to use the limitChecker node in order to check how fast the rig can perform the animation provided.
For operators using this as a reference, the main focus is EtherCAT, Maya workflows, axis limits, import/export, and kinematics, while it also touches on motion smoothing, move programming, robot safety, spline behaviour, and target tracking. It should help when deciding which Flair workflow, robot behaviour, or setup area is relevant before opening the full video.
The practical setup context is that hardware referenced includes CAMERA_RED and PRECISION_TRACK. This helps connect the video to the rig, accessory, software environment, or workflow label an operator may already be working with.
The chapter links below provide 36 timestamped jumps into the main setup, demonstration, and workflow moments, making it easier to go straight to the section that matches the issue or task being investigated.
Chapters
- 00:09 — simulator tutorial I will show you how to use the limited checker node
- 01:14 — their script editor there and the graph editor node which is already here
- 01:59 — panel's layout as my solving panels layout as I like right the limit checker
- 02:52 — that you need in order to solve and so for velocity is acceleration and values
- 03:41 — node and what I want to do it's to first
- 04:27 — speed and acceleration based on what
- 05:24 — display icon in the time slider you can access to a playback speed menus or sub
- 06:12 — with that speed or actually hitting one
- 07:07 — the first thing that you want to do after you've selected a limit checker
- 07:56 — moment I'm using only the track because
- 08:42 — you will find under the limit checker
- 09:30 — set the velocity of box velocity of the
- 10:15 — like that so if the velocity of the
- 11:27 — motors so it's dirty as a safety measure so it's more like an
- 12:19 — you look down the channel box the input truck acceleration fps is 19 is 19 frame
- 13:11 — acceleration and deceleration issue that
- 14:04 — to specific basically specific to their own access so truck will have from zero
- 14:52 — compound to our velocity and
- 15:52 — velocities has been computed and acceleration has been computed too so I
- 16:38 — the rail so with one piece of we won the
- 17:49 — locator of the Ren's nose is the zero of the truck so
- 18:37 — the limit values of the limits of my
- 19:23 — warnings about the acceleration of the
- 20:11 — probably check that the value of the rail is now 68 centimeters against the
- 21:01 — velocity rover or acceleration of the
- 22:05 — say take out 10 centimeters from truck trouble still a bit still a bit too fast
- 23:31 — would do in flair about velocities and acceleration per axis the only thing
- 24:24 — for truck red is position Green is the velocities blue is acceleration and what
- 25:09 — for I use more smooth it's blind so it
- 26:00 — they're mathematically speaking is there and the enemy checker node picks it up
- 27:12 — the tangent so I will hide them select it and buffer the queue buffer the curve
- 28:00 — so these values 1 9 1 meter 98 and the original value before the smooth was 1
- 28:49 — the acceleration and deceleration it's
- 29:41 — different mathematics behind the spline
- 30:28 — the viewport in Maya especially with
- 31:17 — check what access are giving you warnings through the limit check it out
9. Simul8 Import kinematics tutorial

In this Simul8 tutorial we'll show how to import kinematics and axis limits from Flair to Simul8 in order to have matching values on both systems.
For operators using this as a reference, the main focus is EtherCAT, Maya workflows, axis limits, import/export, and kinematics, while it also touches on motion smoothing, move programming, target tracking, track calibration, and zeroing. It should help when deciding which Flair workflow, robot behaviour, or setup area is relevant before opening the full video.
The practical setup context is that hardware referenced includes PRECISION_TRACK. This helps connect the video to the rig, accessory, software environment, or workflow label an operator may already be working with.
The chapter links below provide 11 timestamped jumps into the main setup, demonstration, and workflow moments, making it easier to go straight to the section that matches the issue or task being investigated.
Chapters
- 00:15 — features introduced with version 1.0.5 import rig kinematics from flare and
- 01:04 — if you want and they should be the same let's close this and go to maya
- 02:45 — everything accordingly to that however in maya the height of the base
- 03:44 — that in these flair kinematics setup the height of the rail from the ground
- 04:40 — different and then import it back to
- 05:47 — over to your rig mover shape node in to
- 06:35 — it's it's for fur so what you want to do it's very similar to how to export the
- 08:00 — nothing to change here it looks all right so let's open maya
- 08:53 — i've got different velocities and different acceleration let's double
- 10:44 — through camera height at zero if you remember from robot kind
- 12:18 — is not going to be like the camera height at zero value is not going to
10. Simul8 Tutorial: 3 node camera animation in carts

In this tutorial we’ll show how to export a 3 node camera animation in carts from Simul8 to Flair.
For operators using this as a reference, the main focus is CGI matching, EtherCAT, Maya workflows, import/export, and move programming, while it also touches on spline behaviour and track calibration. It should help when deciding which Flair workflow, robot behaviour, or setup area is relevant before opening the full video.
The practical setup context is that hardware referenced includes CAMERA_RED and PRECISION_TRACK. This helps connect the video to the rig, accessory, software environment, or workflow label an operator may already be working with.
The chapter links below provide 18 timestamped jumps into the main setup, demonstration, and workflow moments, making it easier to go straight to the section that matches the issue or task being investigated.
Chapters
- 00:07 — control in the simulated tutorial i will show you how to export a camera movement
- 00:59 — a camera aim and up in maya
- 01:56 — i'll delete this you won't need a three notes camera in maya in order to
- 03:02 — let's parent constraint remover node to the
- 03:58 — um let's keep the track here
- 04:56 — bake out or export a move frame by frame so
- 05:50 — rig root node
- 06:38 — check on the keyframes for sparse export
- 07:24 — just got two lines of data inside my exported move
- 08:16 — so same rig remover node
- 09:03 — good cards that is basically very close to our export from maya
- 09:49 — access and in the cgi imports window
- 10:42 — relation to the note the three camera node are the
- 11:29 — so as you can see now on the track i've
- 12:27 — going to ask us to you know reframe or move and
- 13:39 — the lens node offsets it's still the same 24 and
- 14:38 — the curves that are linking the two keyframes in maya
- 15:23 — you import it and that is because of the
Additional Tutorial Videos
Supplementary videos covering Flair 7 setup and troubleshooting topics not included in the main playlists above.
1. Flair 7: Reversing the Lens Motor & Troubleshooting

This video follows on from a previous focus calibration tutorial to cover troubleshooting and motor reversal. It shows how to reverse a Tilta lens motor direction in Flair 7 and recalibrate the lens from scratch after the reversal. The motor port number must match the axis configured in Flair (Focus = Port 3, Zoom = Port 2), and the hand controller channel letter or number must match the motor's radio channel.
For operators using this as a reference, the main focus is lens motor reversal, focus calibration, and Flair 7 axis setup, while it also covers the Reverse flag in Lens Setup, Focus Follows Target, and Focus Independent modes. It should help when diagnosing calibration errors after physically reversing a Tilta motor, or when focus values read inverted after a motor change.
The chapter links below provide 4 timestamped jumps into the main setup, demonstration, and troubleshooting moments, making it easier to go straight to the section that matches the issue or task being investigated.
Chapters
- 00:20 — Tilta motor numbering must match controller and Flair
- 01:46 — Important note: unplugging motors and adding a 2nd motor
- 02:38 — Reversing the lens motor
- 06:40 — New lens calibration after reversing motor
Keywords: lens motor reversal, Tilta motor, focus calibration, motor port number, Flair axis setup, Focus Follows Target, Focus Independent, invalid Focus positions Target distance, lens setup reverse, motor channel matching, Flair 7 lens, recalibration
- 00:05 — Introduction: follows previous calibration video; covers troubleshooting steps and how to reverse motor direction on the Tilta system
- 00:20 — The hand controller channel letter/number must match the motor's radio channel; the motor's port number must match Flair's axis setup (Focus = Port 3, Zoom = Port 2)
- 01:46 — Adding a second motor after Flair has loaded for the first time won't be detected — reload Flair; reloading the axis board also resets the track home position so rehoming is required
- 02:38 — Physically reversing the motor (turning it 180°); motor self-calibrates to new end stops but Flair now shows wrong focus values — infinity shows as 26 cm, 3 ft shows as 40 cm
- 04:08 — Fix: go to Lens Setup, enable Reverse, Apply; motor does a rapid self-correction spin; focus values now read correctly again
- 06:40 — New lens calibration procedure required after motor reversal; demonstrates storing infinity, close focus, and a middle calibration point
- 08:56 — Calibration error: "invalid Focus positions Target distance" — system refuses to complete calibration when motor is reversed without the Reverse flag set
- 09:07 — Fix for calibration error: switch Focus Axis to Independent mode, go to Focus Axis Setup and apply Reverse, let the motor self-correct its position, then re-calibrate from scratch normally
- 10:47 — Final check: set Focus back to Follows Target to confirm correct position display in measurement units (centimetres)